Field Notes D03
Using Let's Encrypt to Sign a Certificate
Using Let’s Encrypt to Sign a Certificate
First of all, a private key is needed before generating a signing request. You can either use OpenSSL:
openssl genrsa -out ~/domain.com.ssl/domain.com.key 2048
openssl req -new -sha256 -key ~/domain.com.ssl/domain.com.key -out ~/domain.com.ssl/domain.com.csr
or use Azure Key Vault, especially if you want to store the certificate in Azure.
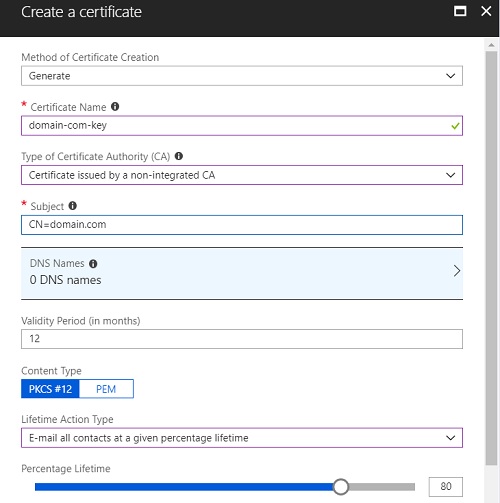
- From Key Vault, go to SETTINGS -> Certificates -> Generate/Import, and set “Type of Certificate Authority (CA)” to “Certificate issued by a non-integrated CA”.
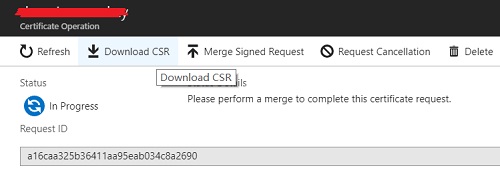
- Click the key created just now, choose “Certificate Operation”->“Download CSR” to download the CSR as domain.com.csr
Now we are going to sign the certificate by using certbot. Here are the steps:
sudo -i
add-apt-repository ppa:certbot/certbot
apt-get update
apt-get install certbot
ufw allow 80
ufw allow 443
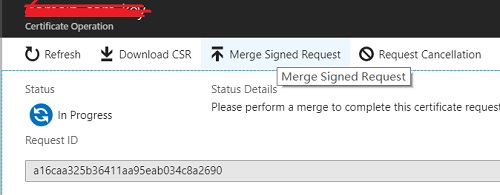
certbot certonly --standalone --register-unsafely-without-email --csr <your_key_csr>.csrIf Azure key vault is being used, we need to “Merge Signed Request”