Networks B11
Azure Active-Active High-Availability Solutions
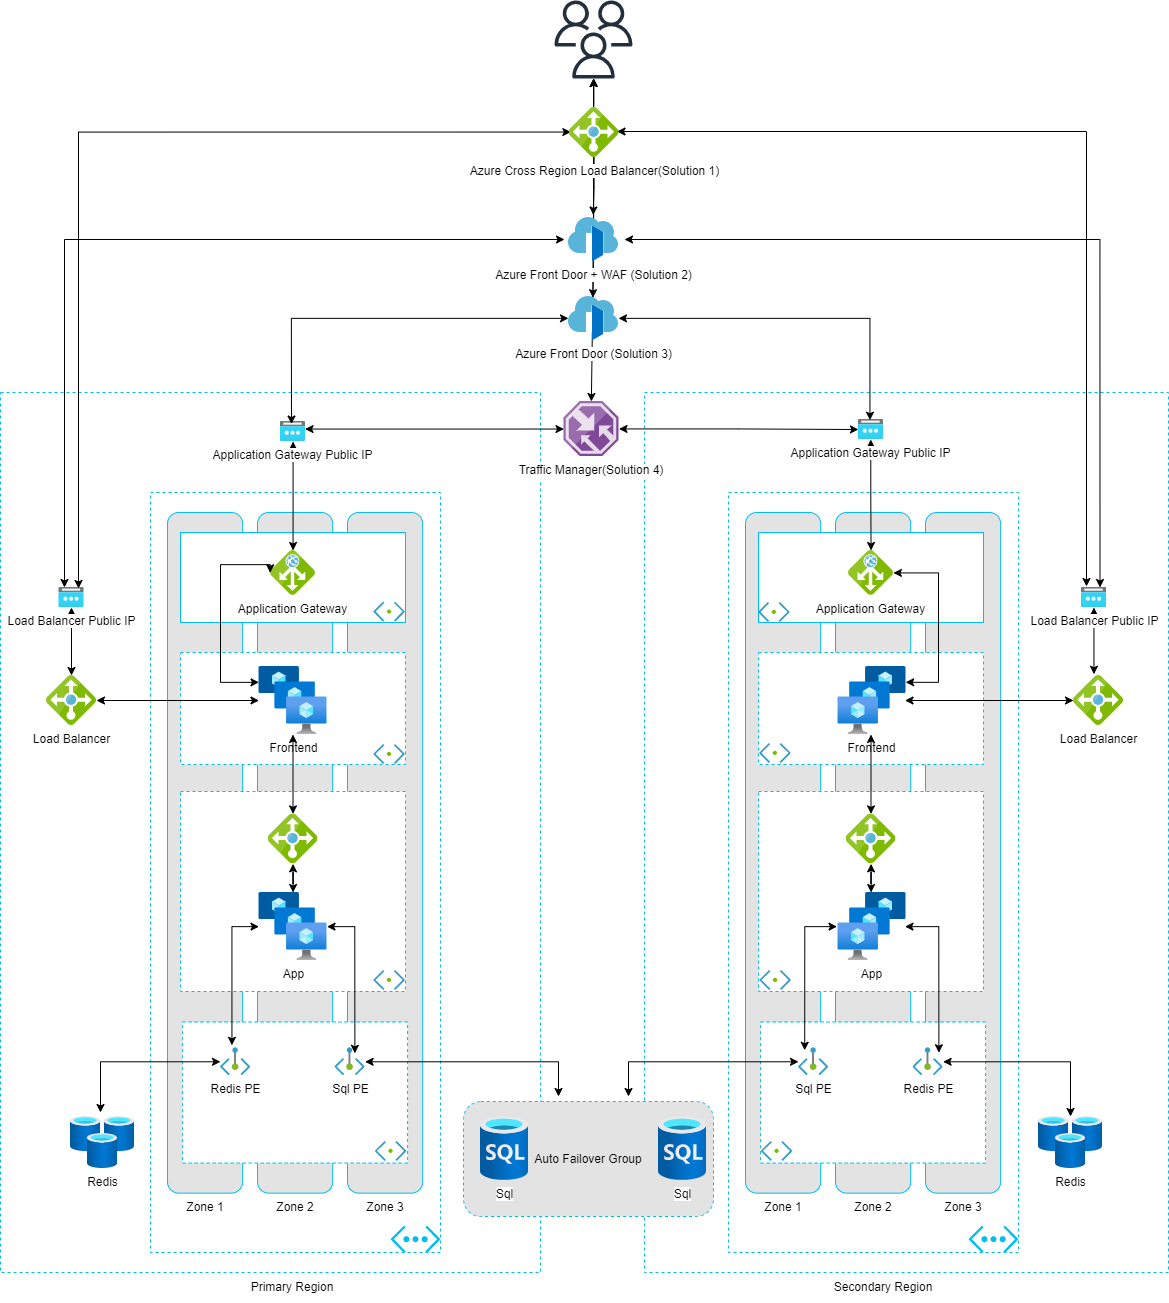
To show various options to deploy an application in active-active high availability mode, including - Azure Traffic Manager - Azure Front Door - Azure Cross Region Load Balancer

This article is based on my recent work in this repo. The completed deployment scripts are in the “Deploy” folder.
Purpose
To show various options to deploy an application in active-active high availability mode, including
- Azure Traffic Manager
- Azure Front Door
- Azure Cross Region Load Balancer
The application uses an Azure SQL failover group to provide geo-replication and automatic failover.
Estimated solution monthly cost
Architecture
Architecture design diagram
Folder Structure
- Deploy - Terraform scripts
- TodoApp - Sample dotnet 6.0 application which uses an Azure SQL database as a backend, there is a prebuilt container image huangyingting/todo available from docker hub.
Deploy
1. DNS
The deployment requires a registered domain name configured for subsequent resources, including certificate automation from Let’s Encrypt, an Azure Front Door custom domain, and so on.
It is recommended to follow these steps to get DNS working before deployment:
2. Create Azure credentials
You will also need to create a service principal and paste its details in another secret called AZURE_CREDENTIALS. This is called a deployment credential. The process for doing this is described here.
az ad sp create-for-rbac --name "spname" --sdk-auth --role contributor --scopes /subscriptions/<subscription-id>In case you don’t want the service principal to have such wide permissions, you can create a regular resource group service principal with contributor rights as explained here and create your resource group through the portal or through CLI statements.
3. Customize deployment variables
You will also need to create a terraform.tfvars file in the Deploy folder with the following values:
email_address = "Your e-mail address used to request a certificate from Let's Encrypt"
dns_zone_name = "Registered DNS name"
certificate_name = "Your certificate name"
dns_zone_resource_group_name = "Azure DNS resource group name in step 1"
azure_subscription_id = "Subscription id in step 2"
azure_tenant_id       = "Tenant id in step 2"
azure_client_id       = "Service principal client id in step 2"
azure_client_secret   = "Service principal client secret in step 2"
4. Deploy
- Install terraform client
- Change directory to Deploy folder
- Run following commands to kick off deployment
terraform init
terraform apply -auto-approve- To destroy the deployment, run
terraform destroy -auto-approve5. Approve private endpoint connections
The last step is to approve private endpoint connections manually (no auto approve currently)
From Azure portal, find Azure storage account created in step 4, under “Security + networking” -> Networking -> Private endpoint connections, check all connections and click “Approve” button to approve the connections.
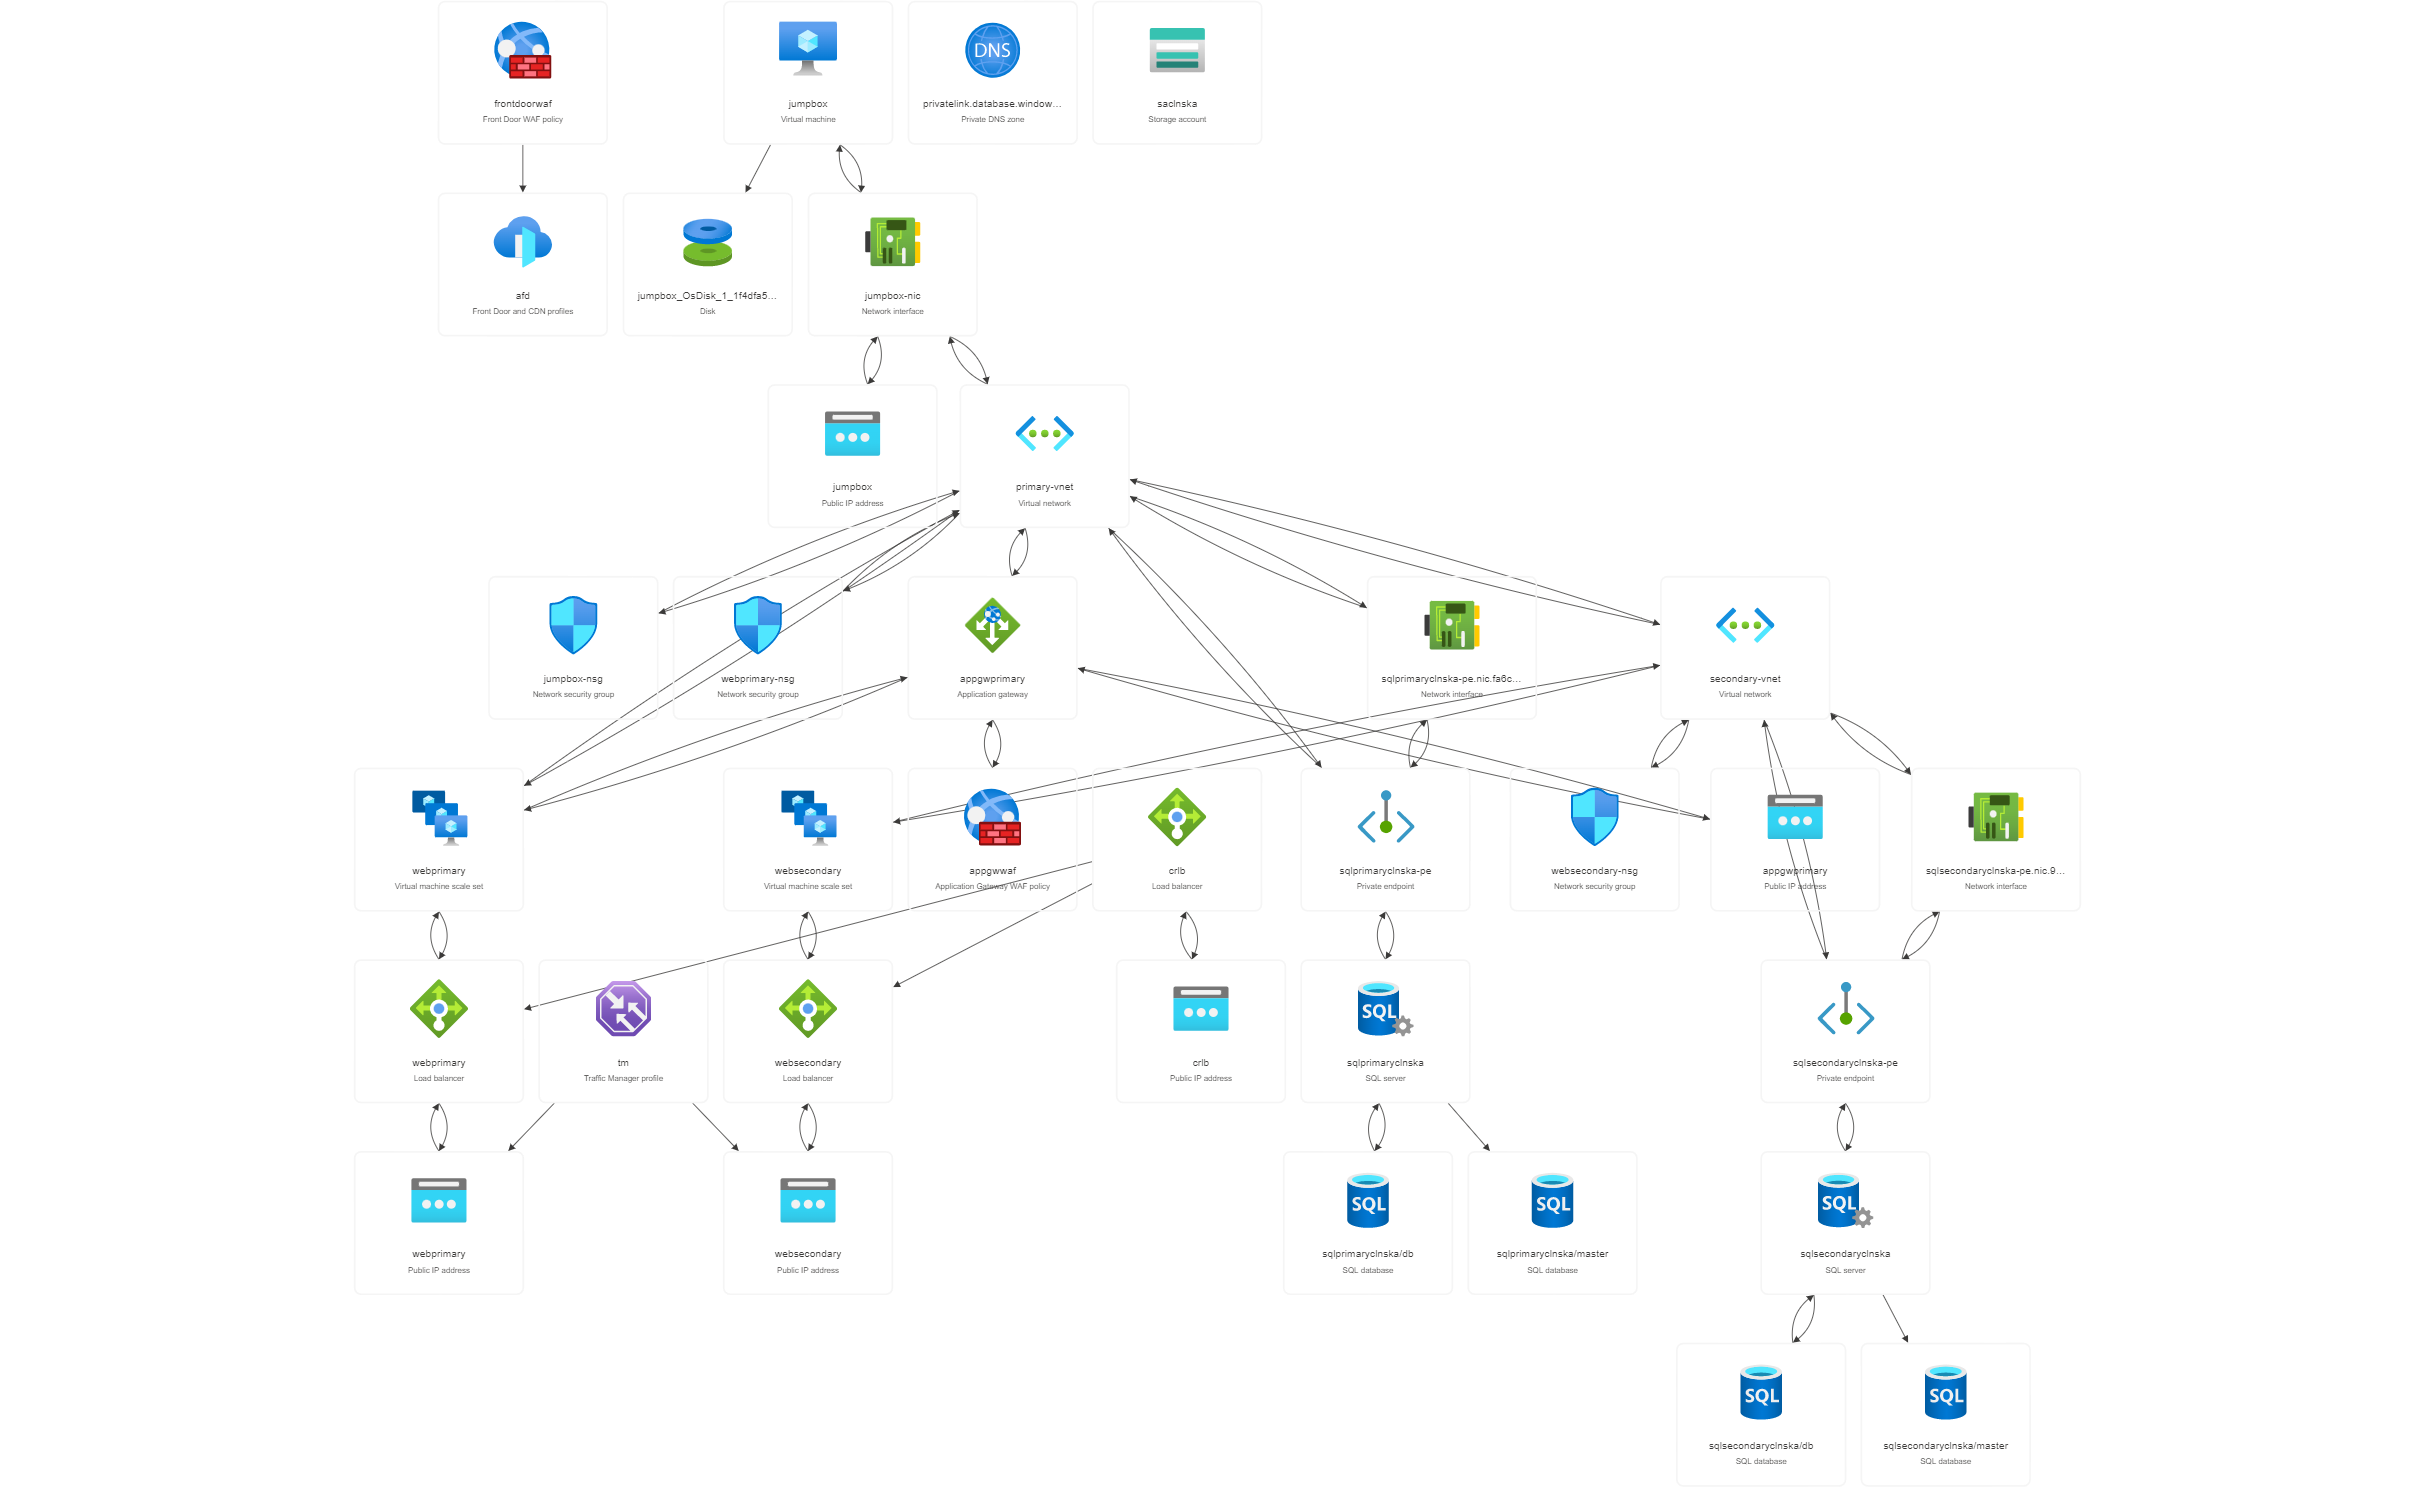
6. Deployed services overview
Below is resource visualization of deployed services
7. Testing
Azure front door waf testing
docker run -v ${PWD}/reports:/app/reports --network="host" \
    wallarm/gotestwaf --url=https://AFD_FQDN
Azure application gateway waf testing
docker run -v ${PWD}/reports:/app/reports --network="host" \
    wallarm/gotestwaf --url=https://APPGW_FQDN